Project: Ender-3 Enclosure
Creating an Enclosure for my Ender 3 S1 Pro
LETS MAKE SOMETHING...
5/17/20247 min read
"If everything appears to be going right, you obviously have no idea what's going on." - Murphy's Law #4
Nothing seemed to work. It is so damn frustrating when everything I know to try yields the exact same results. I reached over and pressed the red stop button on the control panel. I watched as the Ender 3 cycled the print platform, with its copper-colored magnetic print plate, all the way back and then all the way forward engaging the stop switches each time, and I sighed. “Ok, think,” I spoke to the machine set before me, “what is your issue?” I looked down at my print. The layers were good. Each line of the filament is stacked neatly around the perimeter of the object. The shiny metallic-blue colored carbon-fiber polyethylene terephthalate glycol, PETG-CF for short, formed smooth uniform lines encircling the outside of the rectangular-shaped part before me. It was not the printing process that seemed to be plaguing me recently, but the clogging in the printer head. “What can be causing the filament to stop flowing?” I spoke again to no one in particular. “The temperatures are right, the flow is good, layers good,” I began listing aloud “I have changed the nozzle twice already, adjusted the speed, tried changing filament, what is wrong with you.” I made a fist with my hand and thudded it knuckles down on the wooden bench. “Damn it!”
I looked around the room, soldering tools to the left of the printer sat with numerous computer boards, wire, and solder reels collecting dus around themt. A bar LED light glowed quietly overhead and the fans on the Ender hummed rhythmically. I turned my head up at the cieling just to get my eye but not my mind off of the project for just a second. I continued to list possibilities in my head.
Gear speed, no it can't be, I changed that several times already. Filament temps are correct at 240 C. Nozzle size maybe? .04 is as small as I want to go with this filament being so dense. Maybe nozzle temp?
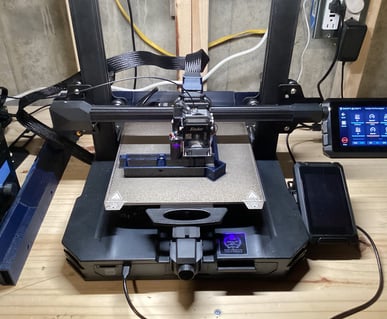
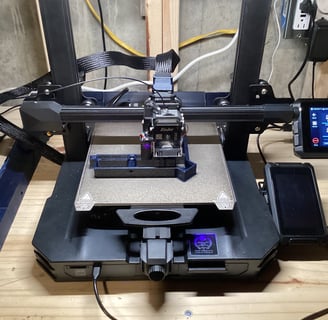
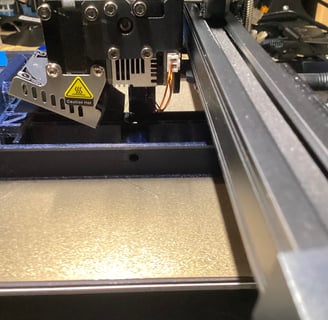
I glanced down at the printer. “Nozzel temp. Nozzle temp could be off, right?” I said to the room. I hunched over a little to get a close look at the nozzle on the bottom of the printer head. I squinted my eyes to get a better focus. A small golden-colored cone protruded from the bottom of the printer head, filament slowly lining its way down to the build plate. I glanced over the printer head. The printer head has a small square fan hummed softly on the left side and had a plastic shroud that reads Creality in white print. On the top is a gray rectangular gearbox with a small black gear protruding through the case with a feed hole where filament from the roll enters the printer gearbox. The filament moves between two opposing gears that turn counter to each other pulling the filament down to the nozzle at the base. The nozzle at the base has a heating element and heatsink that heats the PETG-CF to a blustery 240C. This allows the filament to melt and flow out as a liquid onto the build plate. In front of the feed box and heating element sits a square black motor which turns the gears in the feed.
Is it really that simple? I thought. Could the temperature be changing that quickly from the heater to the nozzle tip?
“If that is the case, then I can change out the nozzle for a heated nozzle,” I said to the printer as though it would agree somehow, “Amazon it is then.”
I sat down in front of my computer which is humming softly just to the right of the 3D printer. The tower glowed blue and green from the fan LEDs spinning quickly within its case and the monitors matched the color-change fading slowly from one to the next. I pulled my glowing keyboard closer to me, opened google and searched for amazon.
“Lets see what is available,” I thought typing quickly.
After finding a heated nozzle on Amazon, I ordered it. Two days from now I will have the part and hopefully that will fix my issues. Fingers crossed.
A few days later and the part arrived in the mail. I took the new heated nozzle out of the box and set it on my blue rubber workpad which was placed a few feet away to the left of the printer on the workbench. My Allen head drivers were hung on the pegboard wall next to the printer. I took one and began disassembling the printer head.
Each piece I took off the printer head was set neatly in a row in order of removal. I normally do this as a habit which I picked up from the many tear-downs I have had to do to this printer. I aligned the screws in order too, placing each one on the print platform to keep them away from any chance of falling to the cement floor and disappearing forever. There has to be a corner somewhere in this room just brimming with lost and wayward screws, nuts, and washers.
The nozzle on the printer head was glued inside the heater block. I keep a lighter handy just for this reason. Apply some heat to the block and the nozzle unscrews easily. It is like I have done this a few times before.
The new nozzle is a ceramic cylinder wrapped in black foam. A small clip holding four wires with two connectors is attached to the outside. This nozzle has two heated elements; one for the the block and one for the ceramic. “This should do quite nicely,” I said to the room holding the new components up to the light “Let us hope this works.”
I screw the new nozzle into the heater block and begin reassembling the printer head. With every screw accounted for, the process went smoothly. I attached the head to the printer, connected the ribbon cable, and turned on the printer.
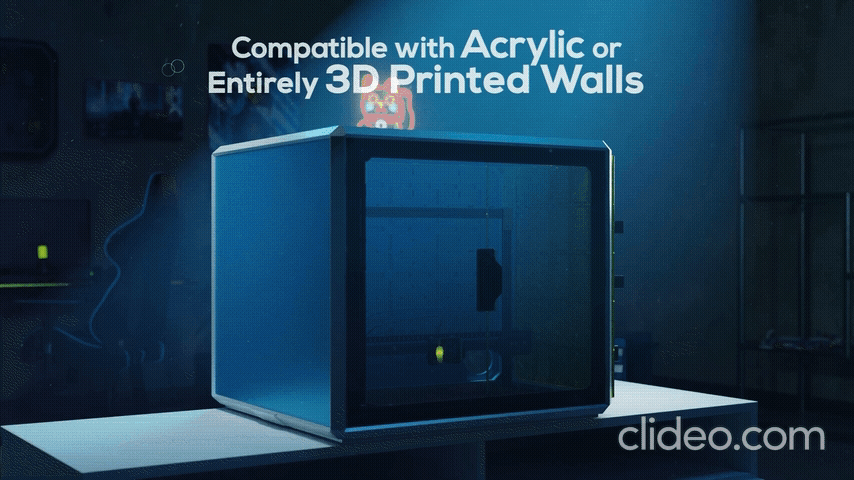
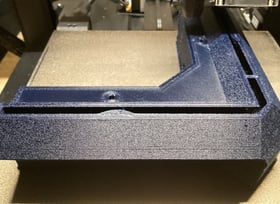
Once the printer and control panel were fully booted, I selected my first print. I decided to go with the same print I was trying a few days ago. While looking for new releases from Brandon Sanderson on Kickstarter several months prior, I wandered across a campaign that was in its final few hours of funding. PrintableAccessories was a startup company that had created a modular, lego-style 3D printer enclosure that could be self-printed and assembled by the user. I read through their content and decided to give it a try. I donated money to their campaign and awaited the end to come. A few days later I received an e-mail with all the parts lists, printsheets, and instructions. I loaded one piece up in Cura and sent it over to my printer. The first print came out all right. The filament I was using, Poly Lactic Acid PLA for short, printed the part but was very weak and broke easily. I needed a firmer filament, but one that could withstand temperature changes, be laterally strong, yet not too difficult to print with. I figured a carbon fiber reinforced filament would have all of those specifications. Amazon to the rescue again.
Once the new filament came in, I selected one of the components from the print list and tried to print it. Fail. The printer head stripped out the filament and clogged the nozzle. I tried again. I adjusted the tension on the feed gear. Fail again. I returned the tension back and tried dehydrating the filament. Fail. Clogged again. I Tried changing out the feed tube to nylon. That worked for a few parts requiring me to babysit the whole print. After a run of three parts, fail again. This run was a big failure clogging the whole feed head. I had to order new parts.
“Sonovabitch, “ I would say again and again, “what can be the issue?” This routine proceeded for almost two weeks. One part would come out fine, The gears would strip the filament, the head would clog, rinse, and repeat. It was at this point that I just had to walk away. I had to let the answer come to me. I had to stop fighting and just let it go. So I did let it go.
Two weeks went by. I had some spare time so I took the feed head off the printer and began cleaning it out. I had my computer on Amazon’s website. I thought that if I replace the feed nozzle with a bigger port that may alleviate the pressure and stop the clogs. I searched for Ender-3 nozzles. The first selection to appear was a heated printer nozzle specifically made for my Ender series printer. Could this fix my issue? I thought. Could it be this easy?
A month after giving up on printing and walking away, I had found my answer. The heated print nozzle keeps the filament from cooling too quickly. That was my issue all along. The heater block was turning the filament to a liquid, but as the filament reached the nozzle, the cooling fan was cooling the nozzle to well and causing the filament to solidify in the nozzle, which caused it to clog, which caused the filament to bind up in the print head. Problem solved and all it took was walking away and letting the answer come to me instead of fighting. Project Ender Enclosure is finally under way, full steam ahead.

Subscribe
whatsonthebench2024@gmail.com
Connect
Follow us on social
John Dennison is a participant in the Amazon Services LLC Associates Program, an affiliate advertising program designed to provide a means for sites to earn advertising fees by advertising and linking to amazon.com . Please refur to the User Agreement for any questions.